Onboard a new tenant demo with API.
In this demonstration, we will show you how to use the API to create a new billing account with a suitable quota configuration. We will first create a new account, then a new user, and grant the user cooperation permissions. Finally, we'll assign the new account quota to our Slurm and k8s cluster.
| First, we need to retrieve our token for API access. Go to the dashboard and obtain your own API access key and secret. |
There are various ways to store the API key and secret. In the following demo, we will use the shell command to export it as a shell environment variable. However, this method is not secure for storing API access. If you have any security concerns, please generate a new API key.
export OASIS_KEY=<API KEY>
export OASIS_SECRET=<API KEY SECRET>
export OASIS_HOST=<API DOMAIN>|
All the preparations are complete; let's begin. First, we need to understand what billing accounts currently exist. Considering that the billing account structure is hierarchical, the root billing account is 'ALL'. The result should be like the following: |
|
Now, we can create a new billing account. For example, let's say we want to create an account under OneAsia, owned by 'Test'. This account can have a maximum of 10 users, with a unique GID of 4001. The result should be like the following: |
 |
|
After that, we can create a consumer account under the newly created billing account. The consumer account is the actual account that the researcher will be working on. The result should be like the following: |
#create
a
consumer account
curl -k -XPOST https://$OASIS_DOMAIN/my-accounts/oneasiaai/child-accounts/new-account \
-H "Content-Type: application/json" \
-H "Authorization: Bearer $OASIS_KEY:$OASIS_SECRET" \
-d '{"gid":1031,"fairshare":100,"user_quota":10,"parent":"test","type":"consumer","owner_email":"[email protected]","name":"test_child"}'
Than, we can can create a user
# create a new user
curl -k -XPOST https://$OASIS_DOMAIN/my-accounts/account/test/create-user \
-H "Content-Type: application/json" \
-H "Authorization: Bearer $OASIS_KEY:$OASIS_SECRET" \
-d '{"login_id":"test","full_name":"test test","email":"[email protected]","password":"password12345678","mobile":91235678}'
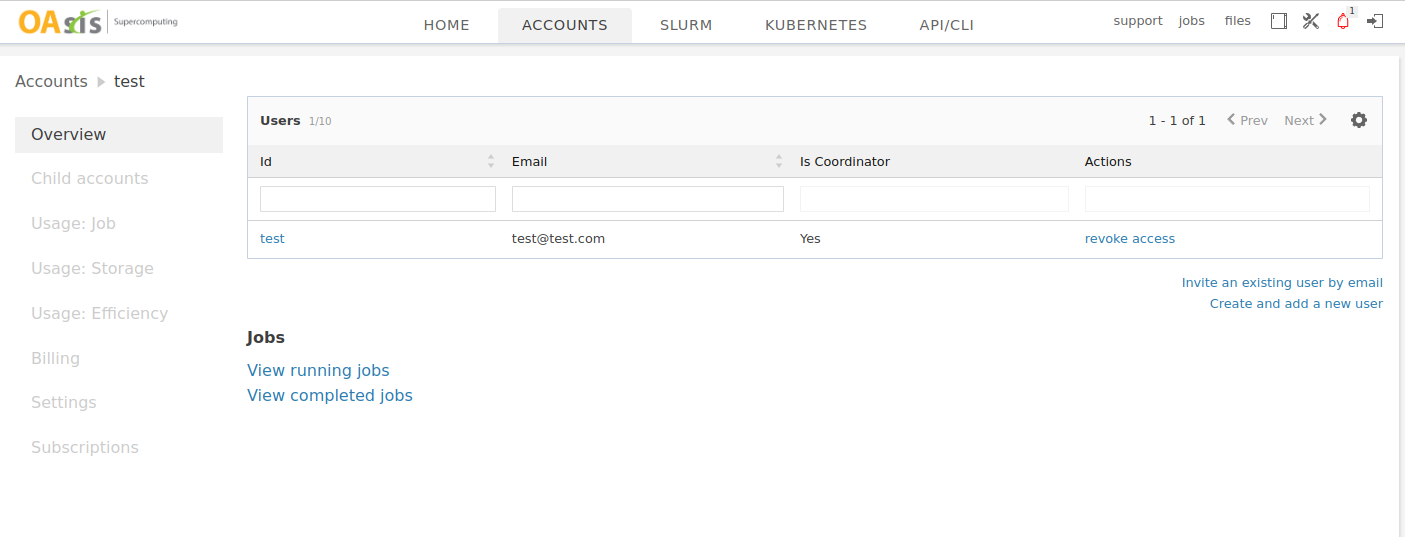
The result should be like the following:
We need to assign coordinator permissions to the manager's account. The account coordinator has the authority to modify the configuration of that account and its subordinate accounts.
# grant coordinator permission to that account
curl -k -XPOST https://$OASIS_DOMAIN/admin/accounts/test/user/test/set-coordinator \
-H "Content-Type: application/json" \
-H "Authorization: Bearer $OASIS_KEY:$OASIS_SECRET" \
-d '{"value":true}'
The result should be like the following:
Finally, we onboard a new billing account, facilitated by a coordinator.
The next section is assign a proper quota in slurm. In the web interface, it is in the setting section.
First, we can disable the setting that allows the coordinator to edit the quota.
#change slurm quota editable from coordinator
curl -k -XPOST https://$OASIS_DOMAIN/my-accounts/test/set-quota-editable-by-coordinator \
-H "Content-Type: application/json" \
-H "Authorization: Bearer $OASIS_KEY:$OASIS_SECRET" \
-d '{"value":"No"}'
The result should be like the following:
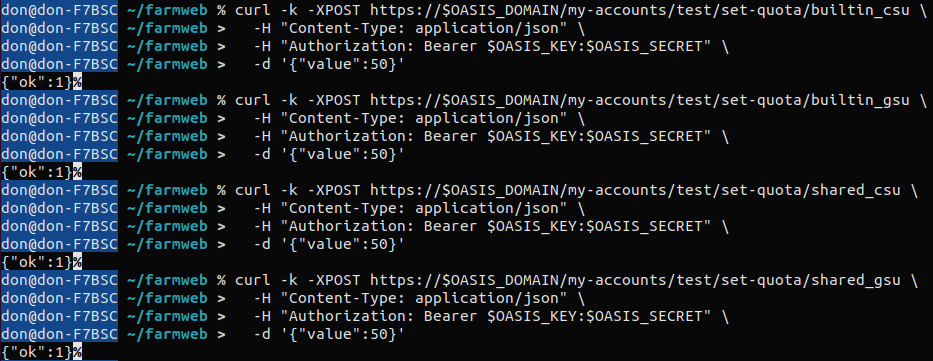
Next, we can set the Slurm quota by resource pool. This example assumes that the Slurm cluster has two resource pools: 'builtin' and 'shared'.
#set slurm quota to that account, for example if cluster has two resource pool: builtin and shared
curl -k -XPOST https://$OASIS_DOMAIN/my-accounts/test/set-quota/builtin_csu \
-H "Content-Type: application/json" \
-H "Authorization: Bearer $OASIS_KEY:$OASIS_SECRET" \
-d '{"value":50}'
curl -k -XPOST https://$OASIS_DOMAIN/my-accounts/test/set-quota/builtin_gsu \
-H "Content-Type: application/json" \
-H "Authorization: Bearer $OASIS_KEY:$OASIS_SECRET" \
-d '{"value":50}'
curl -k -XPOST https://$OASIS_DOMAIN/my-accounts/test/set-quota/shared_csu \
-H "Content-Type: application/json" \
-H "Authorization: Bearer $OASIS_KEY:$OASIS_SECRET" \
-d '{"value":50}'
curl -k -XPOST https://$OASIS_DOMAIN/my-accounts/test/set-quota/shared_gsu \
-H "Content-Type: application/json" \
-H "Authorization: Bearer $OASIS_KEY:$OASIS_SECRET" \
-d '{"value":50}'
The result should be like the following:
The default action when a quota is exceeded is inaction. However, we can modify this to either notify us or automatically terminate jobs.
#change the slurm quota exceeded action: option include: auto_kill_jobs, no_action,notify_only
curl -XPOST https://$OASIS_DOMAIN/my-accounts/oneasiaai/settings/update/quota-exceeded-action \
-H "Content-Type: application/json" \
-H "Authorization: Bearer $OASIS_KEY:$OASIS_SECRET" \
-d '{"value":"auto_kill_jobs"}'
Next, we can adjust the budget settings. Both quota and budget are limitations on team usage. The quota is from a resource perspective, while the budget is from a financial perspective.
#change slurm budget editable from coordinator
curl -k -XPOST https://$OASIS_DOMAIN/my-accounts/test/set-budget-editable-by-coordinator \
-H "Content-Type: application/json" \
-H "Authorization: Bearer $OASIS_KEY:$OASIS_SECRET" \
-d '{"value":"No"}'
In this demo, we set 20000 as budget
#set money-wise budget to that account
curl -k -XPOST https://$OASIS_DOMAIN/my-accounts/test/set-budget \
-H "Content-Type: application/json" \
-H "Authorization: Bearer $OASIS_KEY:$OASIS_SECRET" \
-d '{"value":20000}'
In a Slurm budget, you can set notifications and job launch restrictions to activate when an account exceeds a certain ratio of its budget.
#set notifification when budget consumed over certain ratio
curl -k -XPOST https://$OASIS_DOMAIN/my-accounts/test/settings/update/budget-exceeded-ratio/notify \
-H "Content-Type: application/json" \
-H "Authorization: Bearer $OASIS_KEY:$OASIS_SECRET" \
-d '{"value":50}'
# set job restriction when budget consumed over certain ratio, which take 60 minutes to apply
curl -k -XPOST https://$OASIS_DOMAIN/my-accounts/test/settings/update/budget-exceeded-ratio/restrict \
-H "Content-Type: application/json" \
-H "Authorization: Bearer $OASIS_KEY:$OASIS_SECRET" \
-d '{"value":50}'
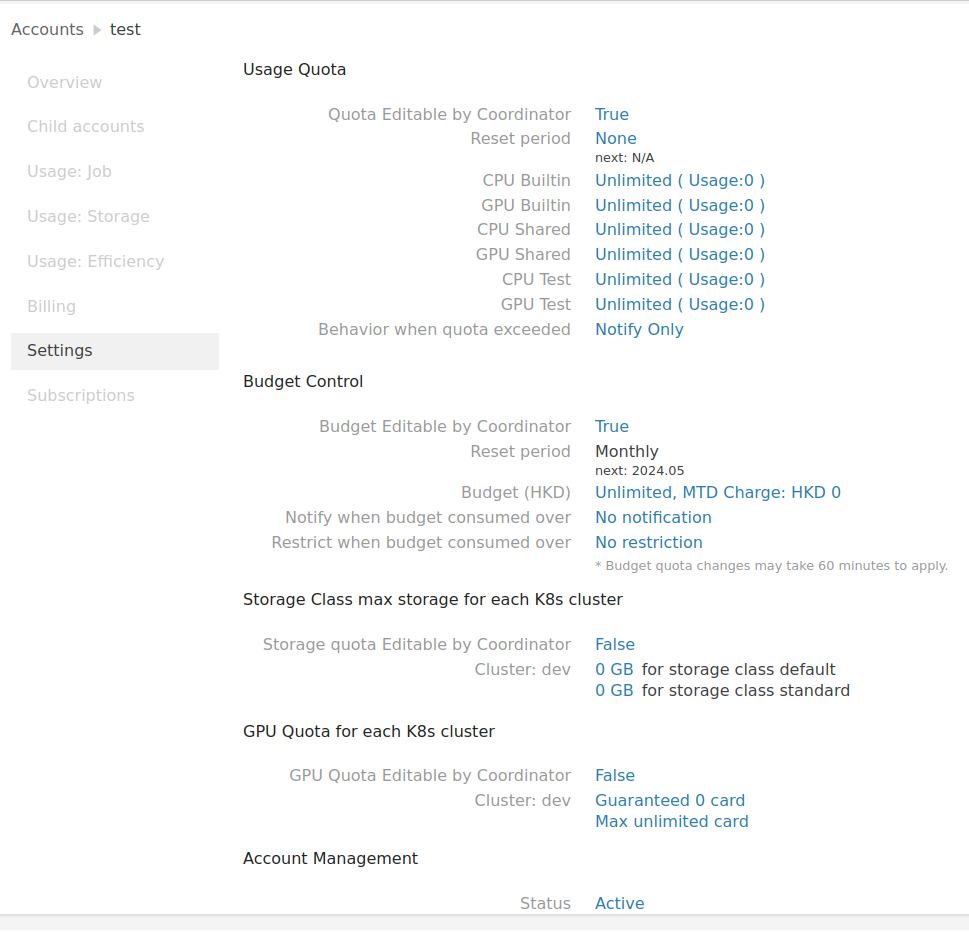
We finish config slurm quota and budget. you can see the change is already show in web UI.
Now we setup quota in k8s. we can use subscription to control account storage and GPU usage
#get all plan
curl -k -XGET https://$OASIS_DOMAIN/my-accounts/test/subscription-plans/view \
-H "Content-Type: application/json" \
-H "Authorization: Bearer $OASIS_KEY:$OASIS_SECRET"
Next, subscribe to a plan.
#subscribe a plan to that account
curl -k -XPOST https://$OASIS_DOMAIN/my-accounts/test/subscription-plans/new \
-H "Content-Type: application/json" \
-H "Authorization: Bearer $OASIS_KEY:$OASIS_SECRET" \
-d '{"plan":"spk7yes","billing_account_id":"test","activation_start_date":"2022.01.01","auto_renew":"on","timezone":"-480"}'
After subscribing, you'll notice that the Kubernetes quota has been updated in the newly created billing account.
Okay, we have finished configuring the billing account. Let's move on to the consumer account
Let's begin by assigning a Kubernetes (k8s) storage quota to a specific account. Suppose the k8s cluster has a storage class named 'default'. We plan to allocate 1GB to the test account.
curl -k -XPOST https://$OASIS_DOMAIN/my-accounts/test_child/set-storage-quota \
-H "Content-Type: application/json" \
-H "Authorization: Bearer $OASIS_KEY:$OASIS_SECRET" \
-d '{"cluster":"dev","scName":"default","value":"1"}'
Next, set the Kubernetes (k8s) GPU quota for that account. Assume that you are setting 1 guaranteed GPU and 1 max gpu in the dev cluster for the test account.
curl -k -XPOST https://$OASIS_DOMAIN/my-accounts/test_child/set-guaranteed-gpu \
-H "Content-Type: application/json" \
-H "Authorization: Bearer $OASIS_KEY:$OASIS_SECRET" \
-d '{"value":"1","cluster":"dev"}'
curl -k -XPOST https://$OASIS_DOMAIN/my-accounts/test_child/set-max-gpu \
-H "Content-Type: application/json" \
-H "Authorization: Bearer $OASIS_KEY:$OASIS_SECRET" \
-d '{"value":"1","cluster":"dev"}'
finish, that is the web UI display after our work
You can also verify this through the API.
verify the consumer account
curl -k -XGET https://$OASIS_DOMAIN/my-accounts/test_child/settings \
-H "Content-Type: application/json" \
-H "Authorization: Bearer $OASIS_KEY:$OASIS_SECRET"
verify the setting
curl -k -XGET https://$OASIS_DOMAIN/my-accounts/test/settings \
-H "Content-Type: application/json" \
-H "Authorization: Bearer $OASIS_KEY:$OASIS_SECRET"


