To researchers
Submit jobs
To cater to users from various knowledge backgrounds with different preferences, we provide multiple ways to use the cluster's resources.
SLURM is our job scheduler. When you need computing resources, you submit a job. The system will then verify your request and your quota. Your job will be submitted to the SLURM queue when it is valid. Then, based on an evaluated priority, SLURM decides when and where to execute your job.
We highly recommend you read the Quick Start User Guide to familiarize yourself with the basic design and usage of SLURM.
Besides using the command line interface to submit jobs, we have several quick jobs to get you the resources with a little learning effort. This way suits people that are more comfortable working with GUI.
Jupyter Lab
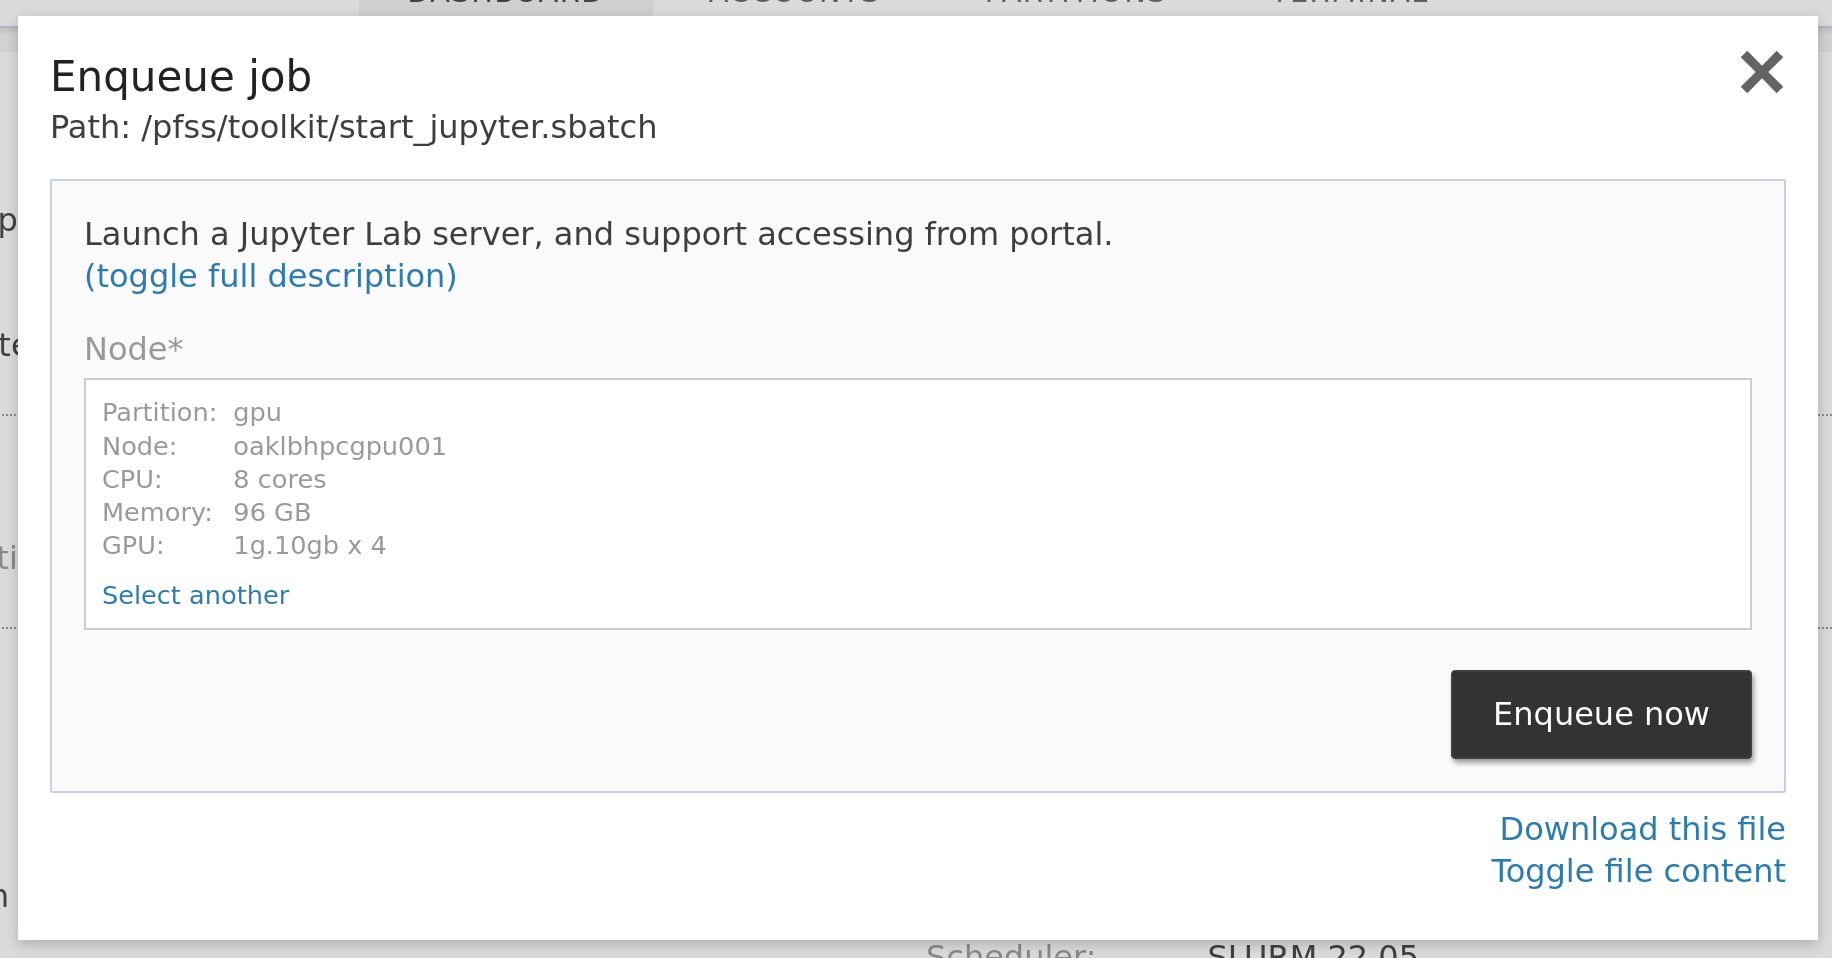
You can launch a Jupyter Lab server of any size in just a few clicks and connect to it without further authentication. We installed the Jupyter Lab in the base environment. So you can use it without any preparation. But you will need to create your Anaconda environment to install the packages you need. Log in to the console and type commands:
module load Anaconda3/2022.05

# for example we create an environment called torch
# install two packages, pip for package management and ipykernel for running our python codes
conda create -y -n torch pip ipykernel

# install pytorch into our environment from the pytorch repo
conda install -y -n torch -c pytorch pytorch
Now we are all set. Login to the web portal, locate the jobs dropdown and click Jupyter Lab. Select the resources you need in the launcher window, then submit the form to enqueue. Head to jobs > running jobs to find your job. Click the Jupyter link to open your Jupyter Lab.
Besides Jupyter Lab, you may launch and connect any web-based tools in the same way. See the GUI launcher section for details.
VNC
Some software doesn't provide a web interface but is a desktop application. In this situation, requesting a VNC server comes in handy. Like Jupyter Lab, the VNC server runs in a node that provides you with the requested compute resources.
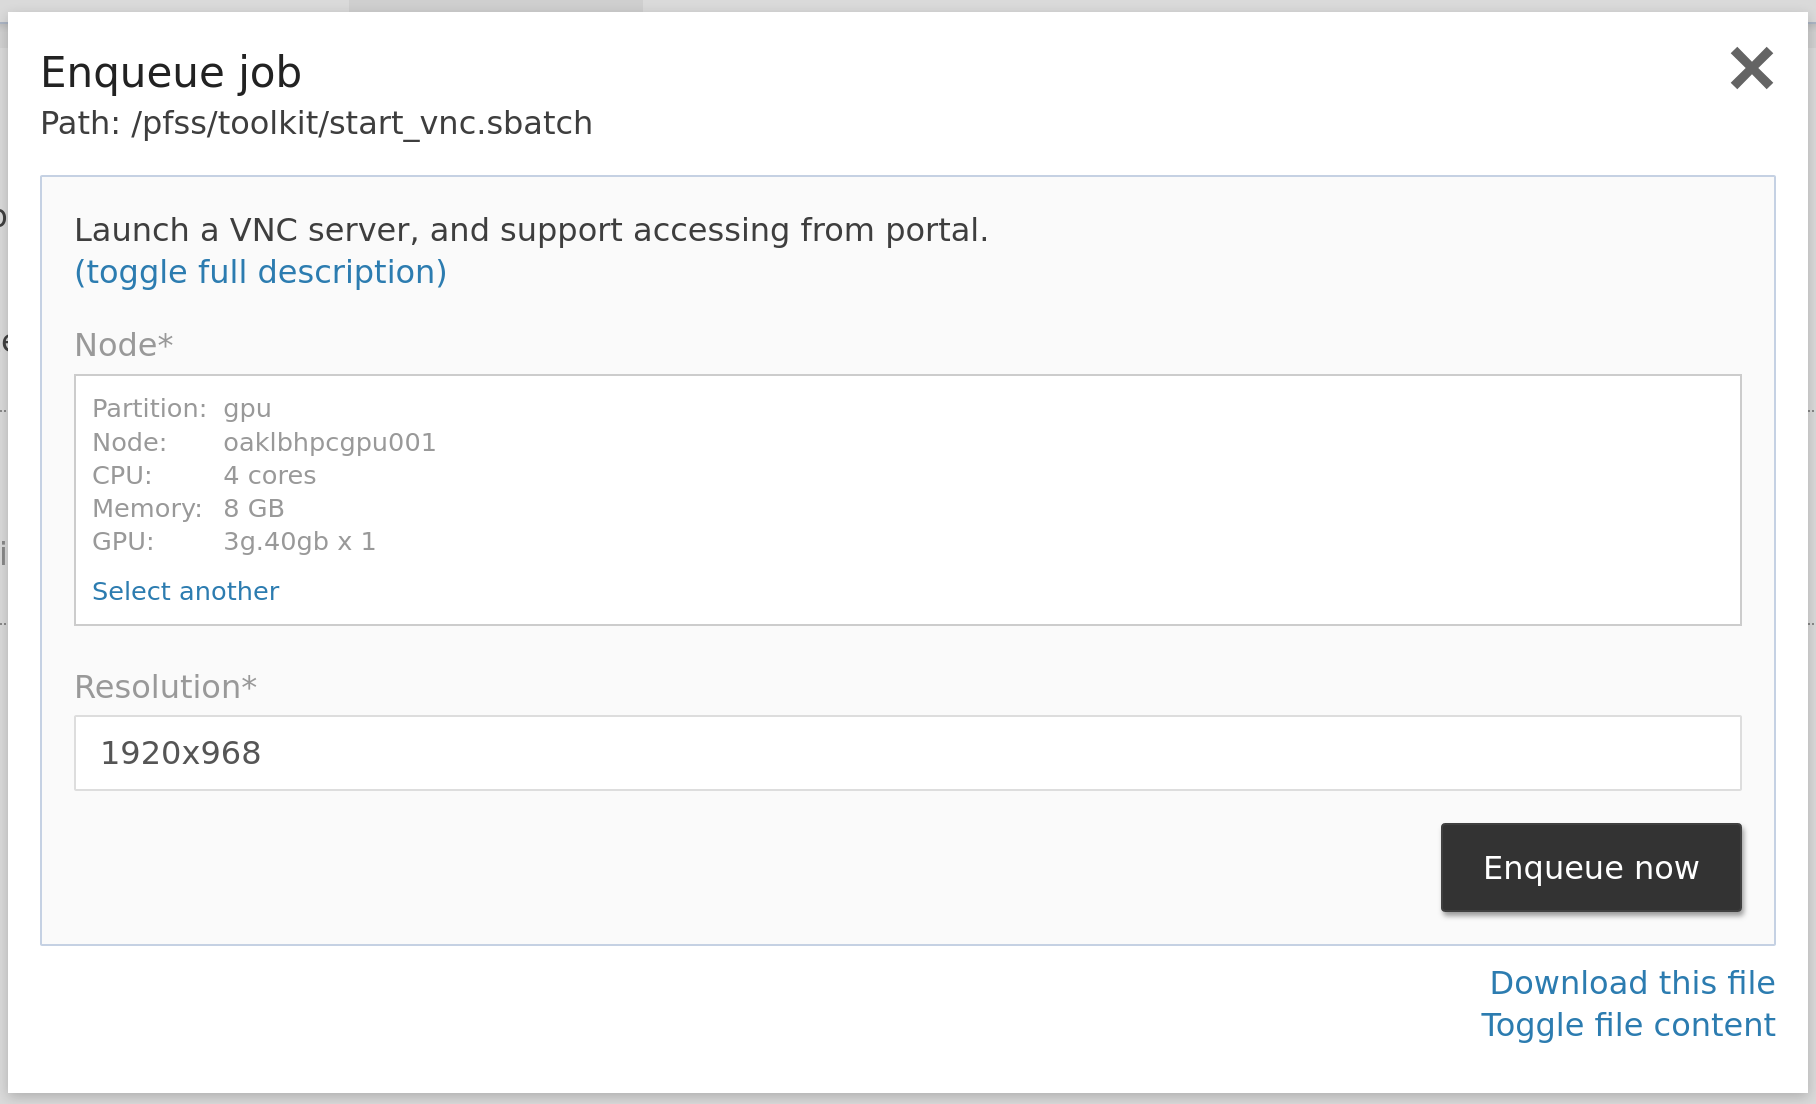
Login to the web portal, locate the jobs dropdown and click VNC. Select the resources you need in the launcher window, then submit the form to enqueue. The portal will automatically set the resolution that suits you, and you usually don't have to change it. Head to jobs > running jobs to find your job. Click the VNC link to connect with our web-based VNC client.
We suggest using containers to run your GUI applications, so there is no need to struggle with the UI toolkits. Following is an example of running RStudio with our provided containers. You may type them in your console to create a shortcut on your VNC desktop.
mkdir -p ./Desktop

echo '
[Desktop Entry]
Version=1.0
Type=Application
Name=RStudio
Comment=
Exec=singularity run --app rstudio /pfss/containers/rstudio.3.4.4.sif
Icon=xfwm4-default
Path=
Terminal=false
StartupNotify=false
' > ./Desktop/RStudio.desktop

chmod +x ./Desktop/RStudio.desktop
Container
The Jupyter Lab and VNC approaches are suitable for interactive workloads. However, for non-interactive single-node jobs, you have another handy option for you. You may enqueue a container job with the quick job launcher.
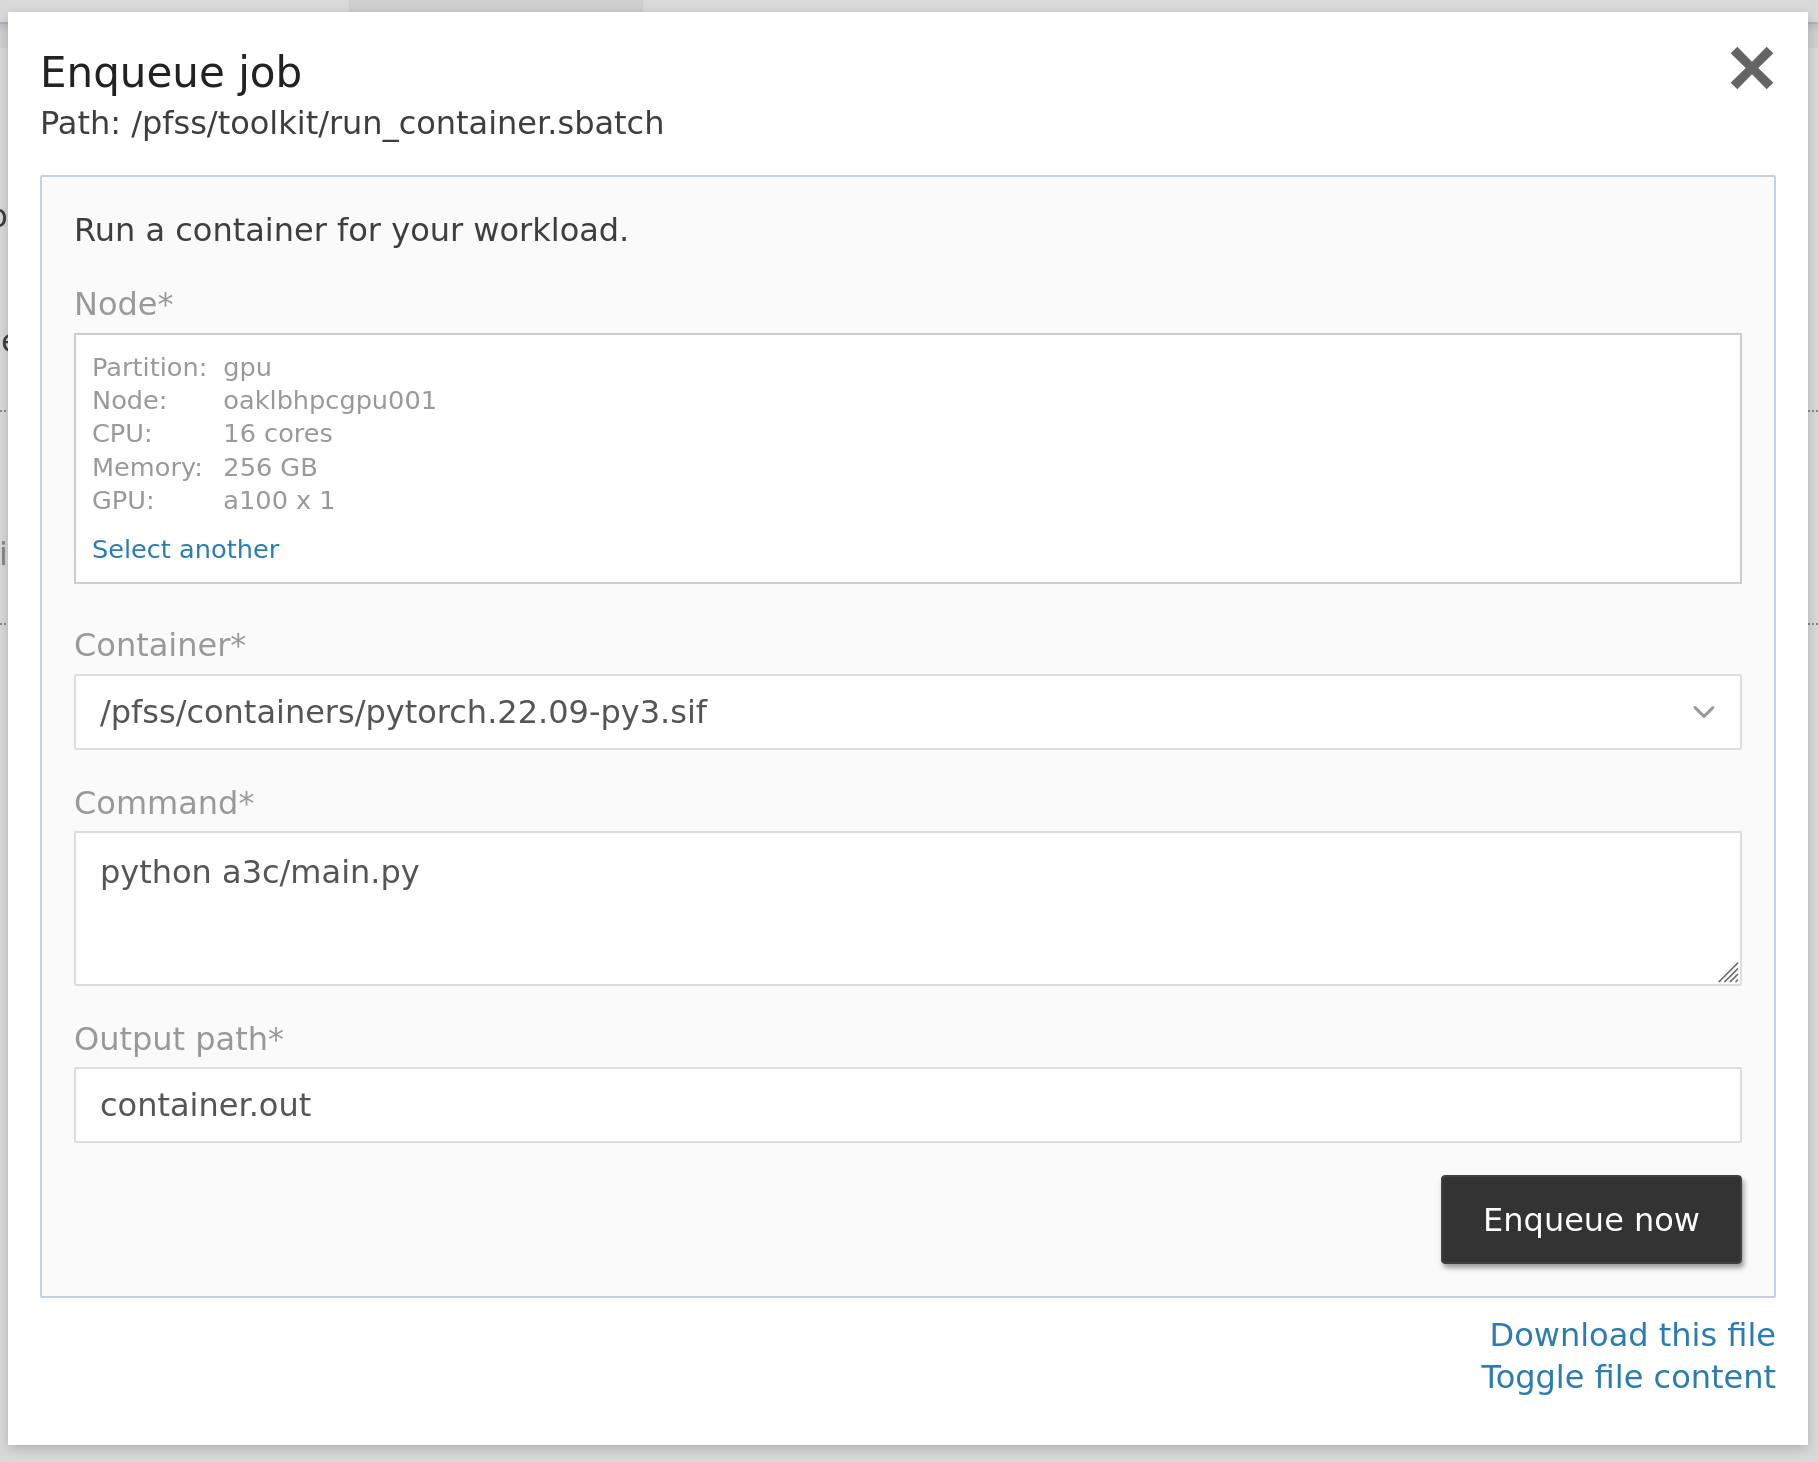
Log into the web portal, locate the jobs dropdown, and click Run Container. In the launcher window, select the necessary resources, pick a built-in or custom container, and type in the command and a path to store the output. Then click enqueue now to let the job scheduler help. You can then head to jobs > running jobs to check the progress.
When our built-in containers don't fit your needs, you may build your image from scratch or extend our containers. We will cover this later.
Launcher
The above three quick jobs leverage the launcher. Users can modify them or even create their own quick jobs. Our web portal sees every .sbatch file as a launchable job. When you are browsing your group scratch folder, there may be some .sbatch files prepared by your colleague. You may enqueue them to SLURM by clicking on them, like the three built-in quick jobs we discussed.
You may also find it helpful to create quick jobs. We will cover this in a later chapter.
Slurm Commandline Clients
For experienced SLURM users, the recommended way is to use the standard srun and sbatch commands. They give you the full power of SLURM. You can allocate multiple nodes with specific resources in one job. They are available in every login node. Please try it out in the "Terminal" tab.
The standard way is to prepare a job script and submit it to Slurm using the sbatch command. The following is an example script. It loads a Conda environment on the compute node and prints out the available Python packages.
#!/usr/bin/env bash

#SBATCH -J test
#SBATCH -o test.out
#SBATCH -e test.out
#SBATCH -p batch
#SBATCH -t 5
#SBATCH -n 1
#SBATCH -N 1
#SBATCH -c 1 --mem=50

# do not sync the working environment to avoid conflict in the loaded conda env
#SBATCH --export NONE

# print out the allocated host
hostname

# load anaconda from lmod
module load Anaconda3

# list available conda env
conda env list

# activate your prepared env
source activate torch

# count the number of installed Python packages
pip list | wc -l
Name the script test.sh, and submit it to Slurm using the following command.
[loki@oaklbhpclog005 ~]$ sbatch test.sh
sbatch: Checking quota for (loki/appcara/batch)
Submitted batch job 180999

[loki@oaklbhpclog005 ~]$ tail -f test.out
cpuamdg10001
# conda environments:
#
codellama                /pfss/scratch01/loki/.conda/envs/codellama
dolly2                   /pfss/scratch01/loki/.conda/envs/dolly2
ldm                      /pfss/scratch01/loki/.conda/envs/ldm
modulus                  /pfss/scratch01/loki/.conda/envs/modulus
modulus-py311            /pfss/scratch01/loki/.conda/envs/modulus-py311
modulus-symbolic         /pfss/scratch01/loki/.conda/envs/modulus-symbolic
torch                    /pfss/scratch01/loki/.conda/envs/torch
vicuna                   /pfss/scratch01/loki/.conda/envs/vicuna

82
If you are unfamiliar with SLURM, the following are some quick examples to get you started. For details, please read the Quick Start User Guide.
# list available partitions
sinfo

# list available generic resources (GRES) e.g. GPUs
sinfo -o "%12P %G"

# run command "hostname" on any node, enqueue to the default partition, as default account
srun hostname

# if you have multiple consumer accounts, you may specify which account to use
srun -A appcara hostname

# enqueue to a partition other than the default one
# e.g. using the gpu partition (still using cpu only)
srun -p gpu hostname

# run on a specific node instead of an arbitrary node
srun -w cpuamdg10001 hostname

# run "hostname" on 2 nodes
srun -N 2 hostname

# request 4 CPU cores, and 1 GB memory
srun -c 4 --mem 1000 hostname

# request 2 GPUs
# using command "nvidia-smi -L" instead to show the allocated devices
srun -p gpu --gpus 1g.10gb:2 nvidia-smi -L
Whether you use srun or sbatch, you submit a request to queues (partition). SLURM then calculates the priority and lets your job run when the requested resources are available.
Priority is calculated based on two factors:
- Age
- The longer you wait, the higher priority your job has.
- This factor reaches the highest effect on day 7.
- Fair share
- The system initializes all accounts with the same fair share value.
- The more resources your account consumes the lower your next job's priority.
- Decay by half every 30 days. So the system slowly reduces the deduction in priority.
Fine tune your workload
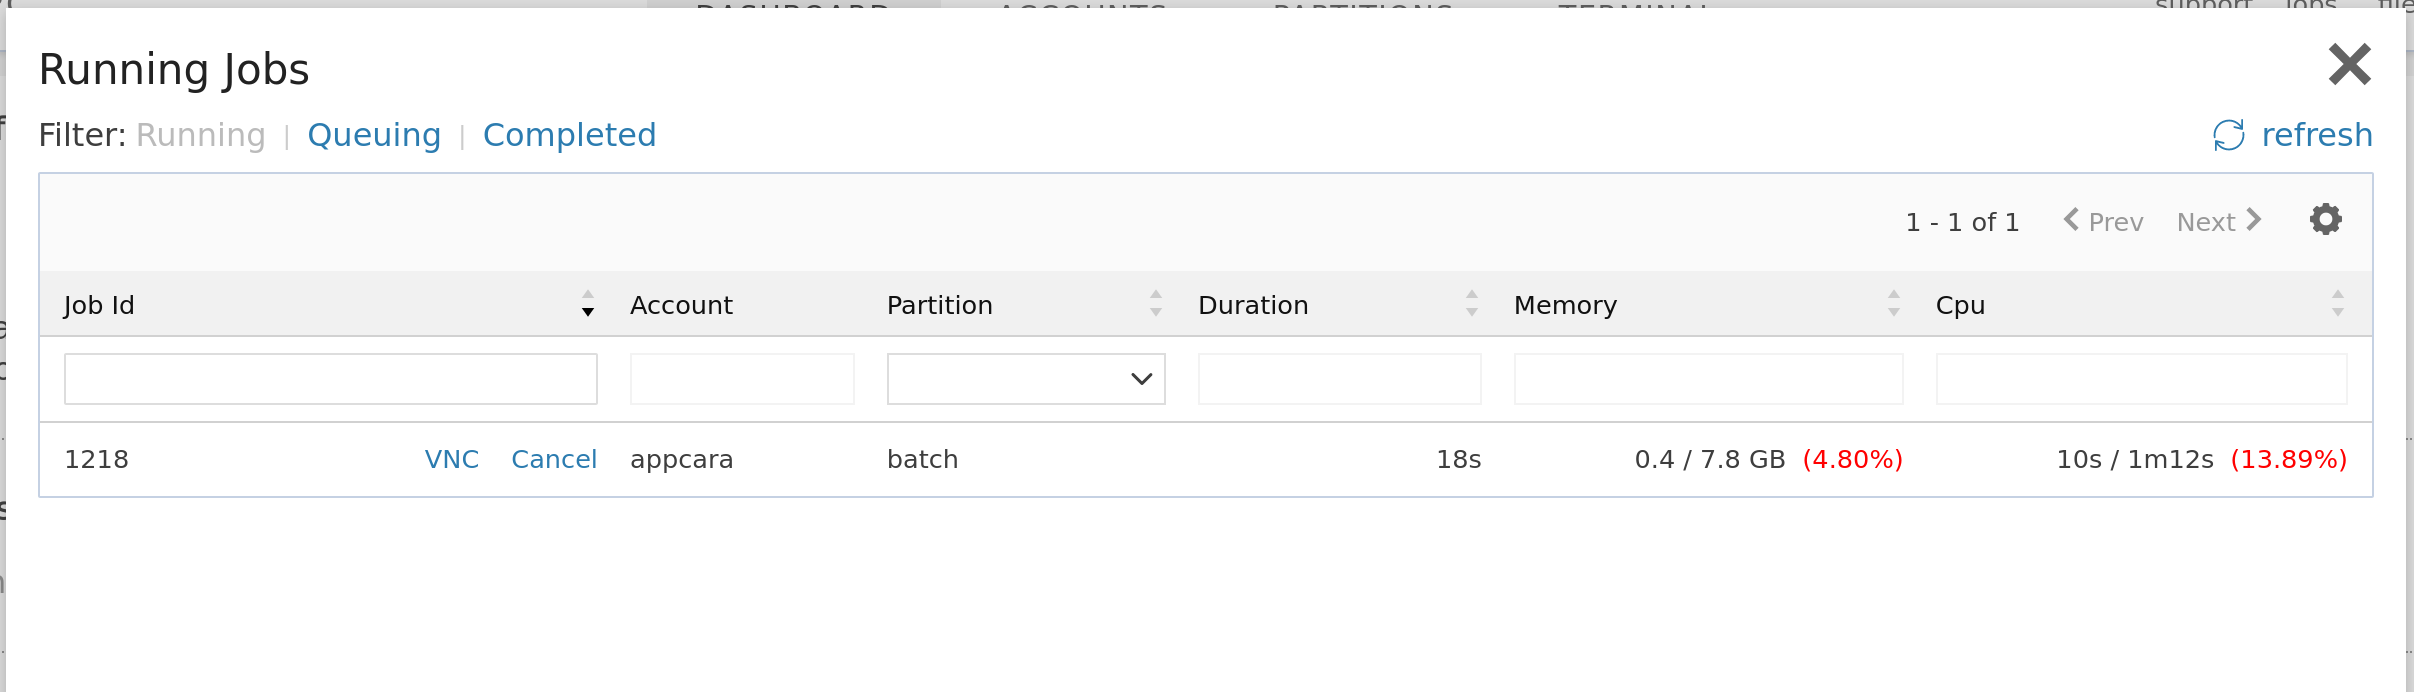
The web portal provides data for you to understand the actual utilization of your jobs, running or completed.
When you have a job running, click jobs, then the running jobs from the top menu bar to see the below screen. This screen tells the duration and consumption/allocation status of memory and CPU. If your job is underutilized, you may consider canceling it by clicking the cancel link on this screen and re-running it with a lower setting.
After a job is completed, you may want to understand the utilization. Open the completed jobs window, search and click on the job id to bring up the below details window. In the efficiency section, you can find the allocated CPU time and memory, with the actual consumed figures.
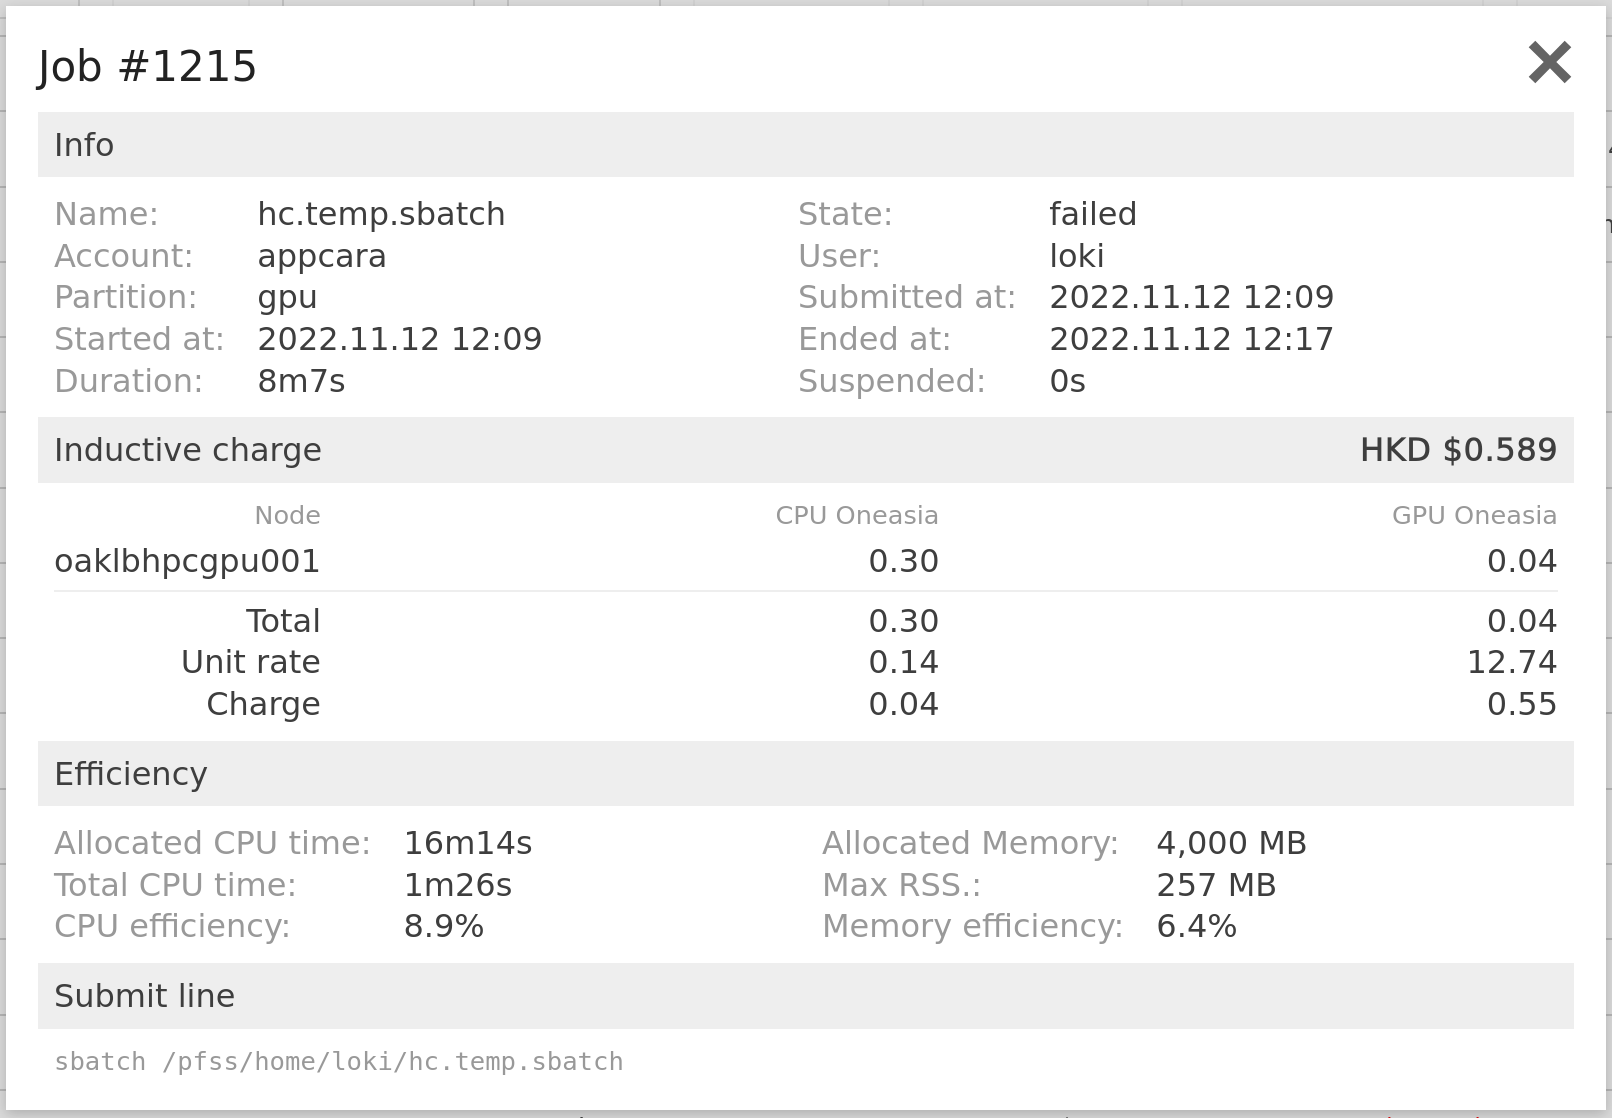
There is also an inductive charge section. Telling what nodes have been allocated to this job and how much the charge is. Here is the standard cost, but not including the tiered price and discount.
To analyze the GPU utilization status of your job, you may want to profile your application. The cluster has both NVIDIA Visual Profiler and Nsight Compute installed. We provide them in both Lmod and through the NVHPC container. Please check them out if needed.
Access your files
The cluster has a parallel file system which provides fast and reliable access to your data. You should have at least 3 file sets:
- User home directory
- For storing your persistent data
- Located at /pfss/home/$USER
- Environment variable: $HOME
- The default quota is 10GB
- User scratch directory
- To be used for I/O during your job
- Located at /pfss/scratch01/$USER
- Environment variable: $SCRATCH
- The default quota is 100GB
- Inactive files may be purged every 30 days
- Group scratch directory
- For storing your files with your group mate
- Located at/pfss/scratch02/$GROUP
- Environment variable: $SCRATCH_<GROUP NAME>
- The default quota is 1TB
- For storing your files with your group mate
There are three different ways to download or upload your files.
Web portal
We built a file browser in the portal. You may open it up by clicking files in the top menu bar.
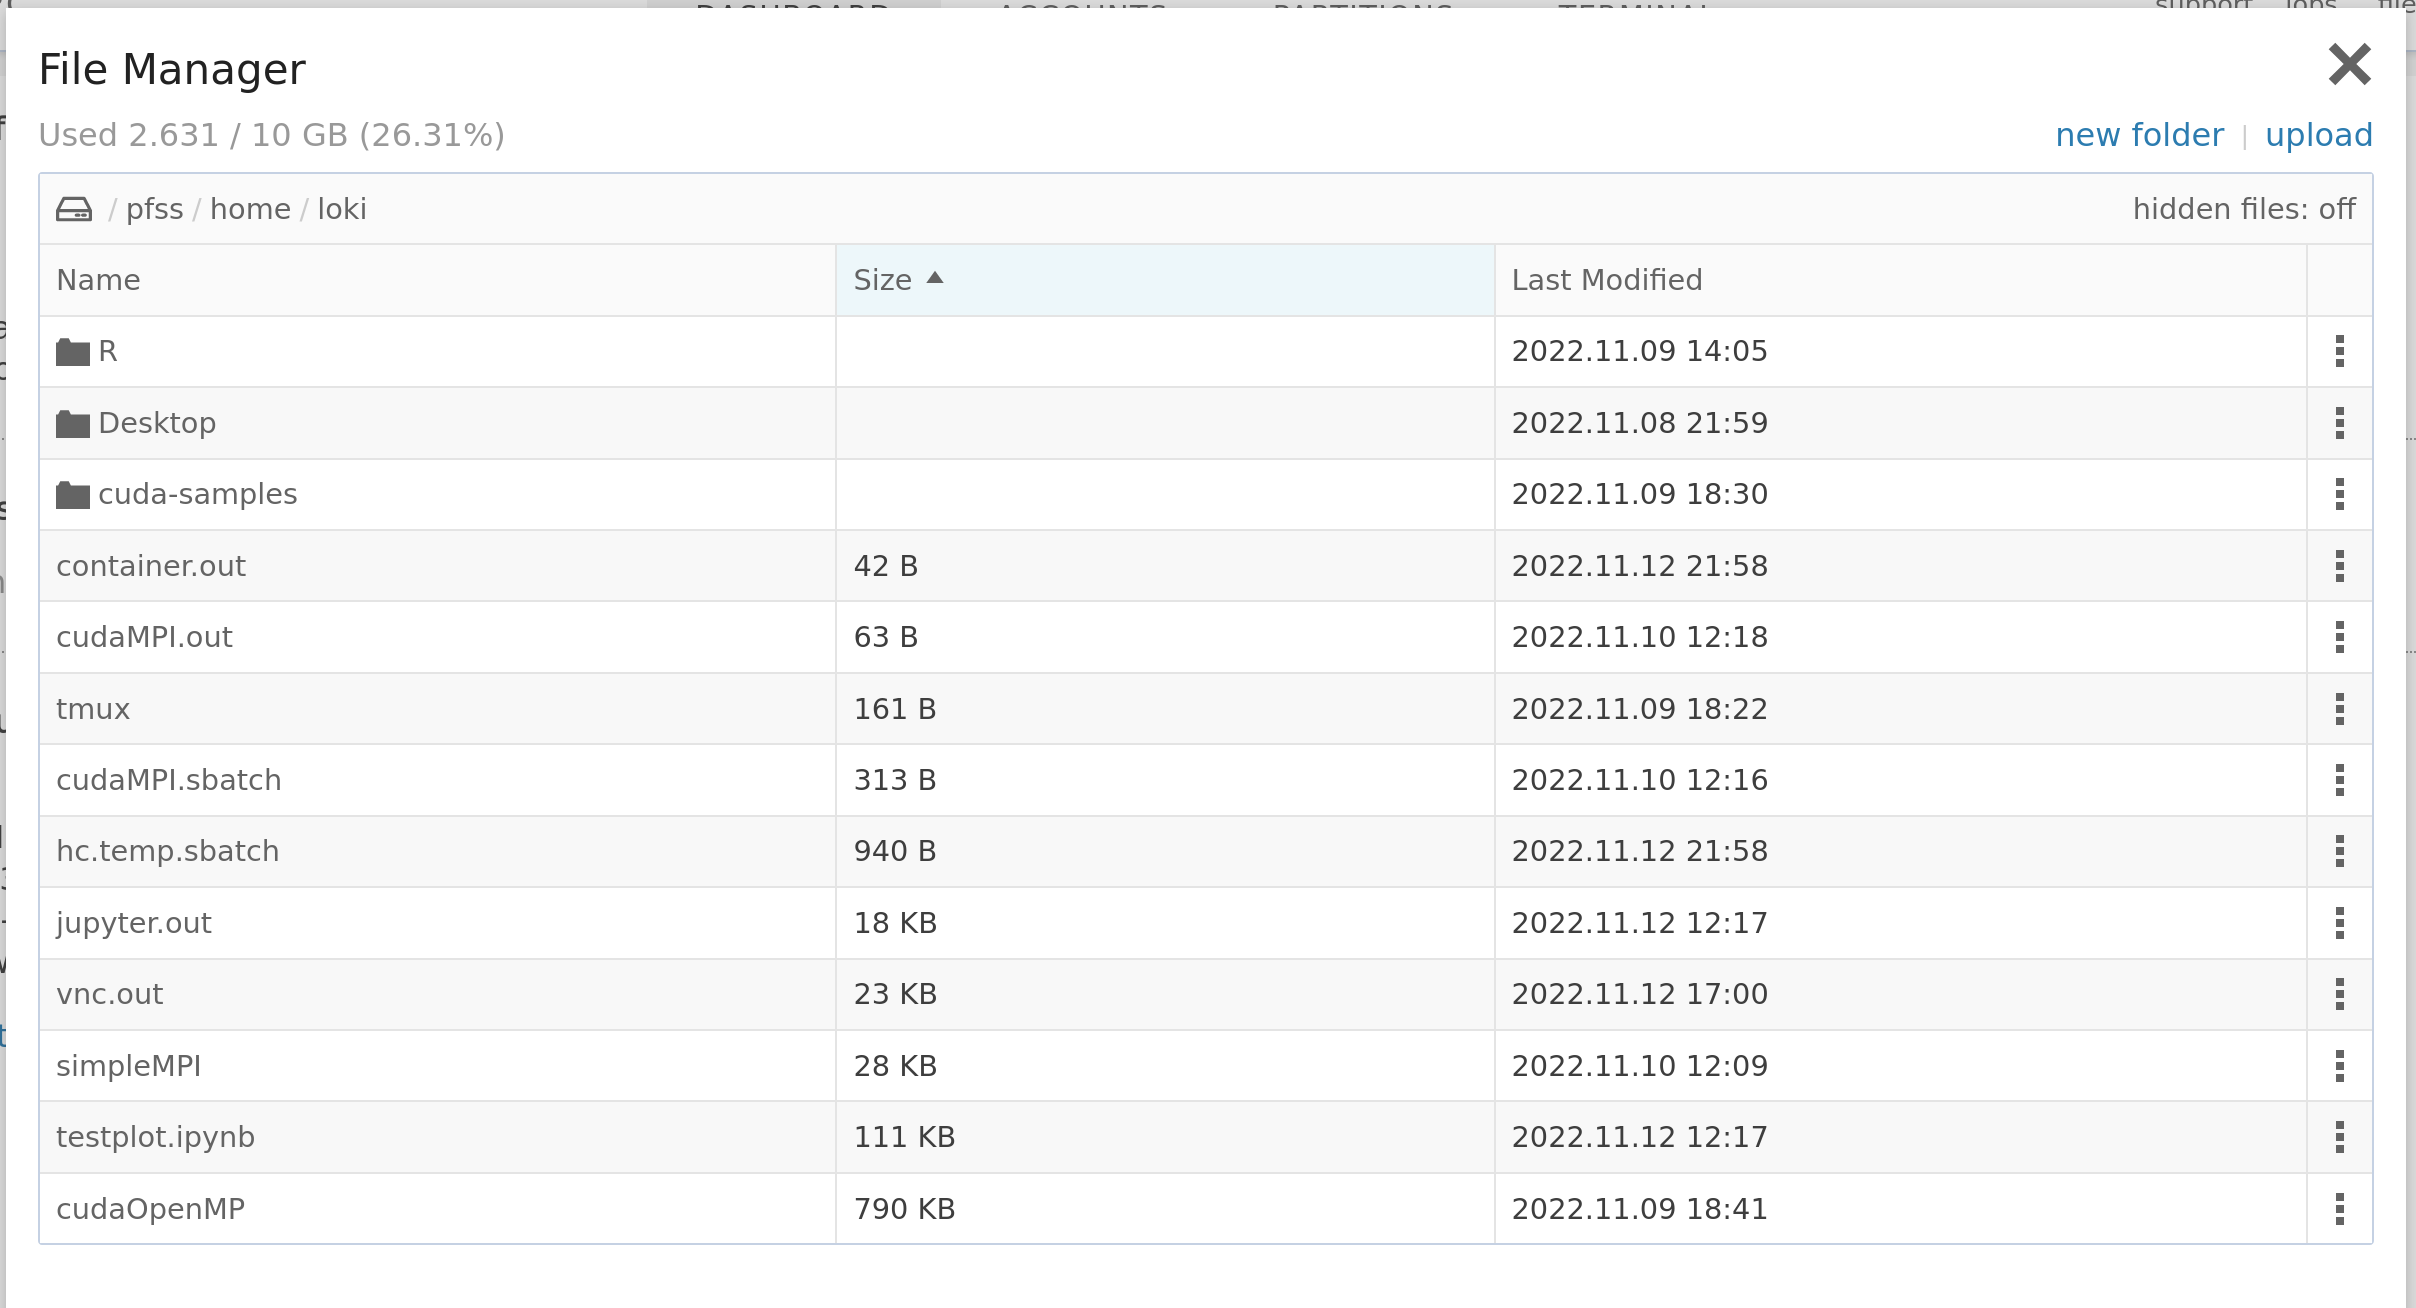
You may switch between different file sets by clicking the hard disk icon. On top of that is the quota and consumption of the current file set. In the top right corner, there is a button for you to upload files. You may upload multiple files at once under a limit of 10GB. If you are uploading 1000+ files, we recommend you zip it before uploading, then unzip it in the web terminal.
Click on the item name to enter a directory or download a file. If it is a .sbatch file, the job launcher will be fired for enqueuing a new job. If it is a plain text file or any format that your browser can handle, it will be opened in a new tab. This comes in handy when viewing your job result without downloading it. There is a dropdown menu on the right-hand side to copy the path, rename, or delete an item.
SFTP
Another way is to use your favorite SFTP client. Download your access key from the home page. Below is an example using the Linux SFTP client.
# a strict file permission is required
chmod 400 loki-pri.pem

# remember to change loki to your own ID
sftp -i loki-pri.pem loki@ssh.hpccenter.hk
Mount to your local computer
When troubleshooting or profiling your application, you may check output files more often. So we provided a shortcut to mount the file set to your local computer using our CLI client.
It depends on SSHFS and is supported only in Linux and Mac OSX. Please make sure the command line sshfs is accessible.
First, you need to download and set up the CLI client on your computer. You should find everything on the web portal home page. Please make sure "Never send private key" is set to no to allow establishing an SSH connection through the client.

Then you may list and mount file sets as follows:
$ hc filesystem-ls
ID                     | Type        | Usage (GB)  | Limit (GB)  | Usage
home                   | USR         | 2.631       | 10          | 27%
scratch                | USR         | 0           | 100         | 0%
scratch_appcara        | GRP         | 0           | 1000        | 0%

$ hc filesystem-mount -t home -m ~/hpc-home
Mounted successfully.
Please use 'fusermount -u /home/loki/hpc-home' to unmount.

$ fusermount -u /home/loki/hpc-home